Essential minimalists gear check list for jungle trail tours

Re: Essential minimalists gear check list for jungle trail t

1_77ce2e9342f9b8d22bed312d17ad40bf.jpg


Here's a link to a hot patch vendor, looks like a very interesting way to fix an inner tube, just use your tire irons instead of the clamp to add pressure and hold in place. I wonder if you could add pressure by putting the patch and tube under the side stand while the vulcanizing is taking place?

http://www.worthpoint.com/worthopedia/s ... anized-can
 
Re: Essential minimalists gear check list for jungle trail t

I save on weight and baggage with this
available for $20 from survivaltoothbrush.com, it features shorter bristles to save weight,
and it's small size makes it easy to put in a pocket or slip in your boot
 

Attachments

  • toothbrush.jpg
    toothbrush.jpg
    106 KB · Views: 1,475
Re: Essential minimalists gear check list for jungle trail t

Kind of OT - but where are you guys buying your mosquito-netted hammocks? I saw some at the army/police shops on the North of the moat but they didn't pack down very small. Not trying to spend a fortune.

TPMB - I bought a lightweight hammock with built in mosquito net for 450 bht today in Chiang Mai. It doesn't come with a rain flysheet but any synthetic ground sheet converts into a rain cover over the hammock, with "flysheet" draped over a length of tight string that's above the center line the length of the hammock.

I think its the same as Alex's (UK)


file.php


file.php


There are two army surplus shops on the north east corner of the moat in Chiang Mai, on the outside of the moat that sell cheap hammocks with built in mosquito nets, map below:
 
Re: Essential minimalists gear check list for jungle trail t

ThePoMoBro - I've sourced my hammocks from the states. Both Hennessey Hammock and Blackbird hammocks work well. They pack down pretty compact, here's my hammock w/built in mosquito net, rainfly tarp, and after freezing in Cambodia one night I now have a down quilt all packed into this compression sack.

1170533003_yzrCK-M.jpg


Here it is deployed without the lightweight down quilt in the picture.

593664420_3vAZj-M.jpg
 
Re: Essential minimalists gear check list for jungle trail t

Getting rid of duplication and saving weight


A lot of adventure riders have figured out that pressure suits are the lightest way to wear decent protection and stay cool.

A pressure suit is an elastic mesh membrane jacket with armor sewn onto critical areas for protection, like the one below

10050-001-2.jpg


If you're doing extended trips then its a good idea to have a rain poncho with you too.

An interesting idea when you're trying to save weight is that if you buy one of the better quality rain poncho's they can double as a rain flysheet for your hammock (or tent), waterproof groundsheet or sun cover when working on the bike, an ideal poncho that will work is below, this was bought in Chiang Mai for 350 bht:
5889919933_a55ed817a9_b.jpg


What makes this style of poncho interesting is that all it really is, is a 2 meter X 1.5 meter rectangle of waterproof material (with a hole in the middle with a hood), a ready made rain fly for your hammock, use this you've just saved another 1/2 kg of gear you need to bring (dump the hammocks flysheet).

5889921819_fcd260d73b_b.jpg


All you have to do is get an eyelet punched in the 4 corners and its all finished.
5890495072_90fa70ea0c_b.jpg


Hennessy Hammocks actually make a rain fly for their hammocks that converts into a poncho, so its not as crazy as it may seem, great weight saving idea, there's pictured below:

catcape-donning.jpg
 
Last edited:
Re: Essential minimalists gear check list for jungle trail t

BobS said:
These hammocks are made in Thailand - available in Chiang Khong

http://www.siamhammockshop.com/

Bob I checked out one of those. Sadly not really a minimalist first gear choice as it was heavy and did not pack small. However they are interesting as you can use it both as a hammock and a tent so it is versatile.

phil great idea on the rain poncho doubling as a tarp. True minimalist. What about rain getting through the head opening when used as a shelter tarp? Is that an issue?
 
Re: Essential minimalists gear check list for jungle trail t

bigntall said:
BobS said:
These hammocks are made in Thailand - available in Chiang Khong

http://www.siamhammockshop.com/

Bob I checked out one of those. Sadly not really a minimalist first gear choice as it was heavy and did not pack small. However they are interesting as you can use it both as a hammock and a tent so it is versatile.

phil great idea on the rain poncho doubling as a tarp. True minimalist. What about rain getting through the head opening when used as a shelter tarp? Is that an issue?

There's a chord to pull the neck area tight, once that's done the hood will flop over the reaming strangled neck hole, making it water tight/ rain resistant.
 
Re: Essential minimalists gear check list for jungle trail t

"Bob I checked out one of those. Sadly not really a minimalist first gear choice as it was heavy and did not pack small. However they are interesting as you can use it both as a hammock and a tent so it is versatile"

Justin - do you recall the price? How about the quality?

Might not be minimalist, but surely cheaper than the $200 price of the lighter and smaller first gear choices.
 
Re: Essential minimalists gear check list for jungle trail t

Bob - The price was not a couple hundred baht, over 1000 if I remember and once I saw the packed size I did not look at it too closely as it was not for me so no idea about the quality.
 
Re: Essential minimalists gear check list for jungle trail t

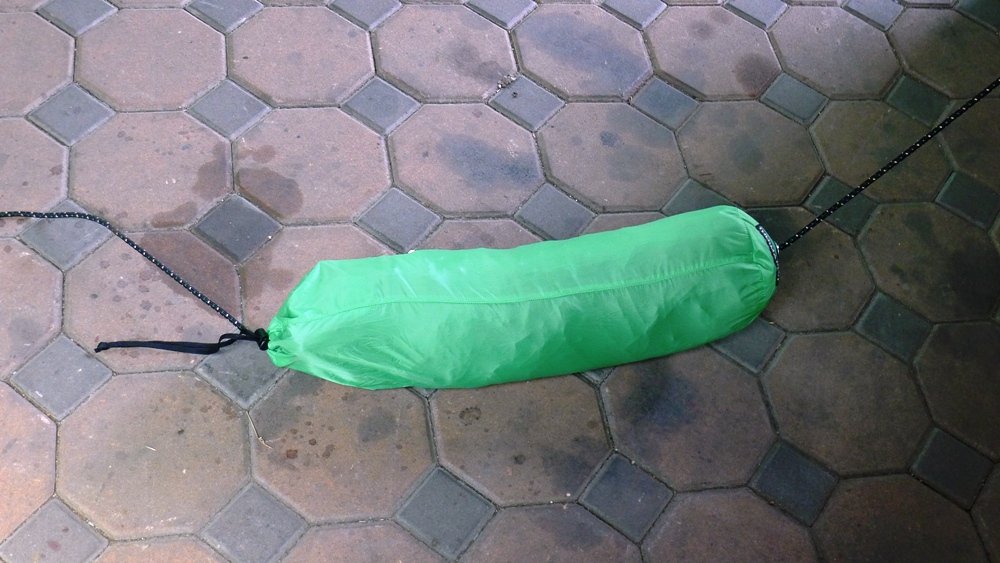
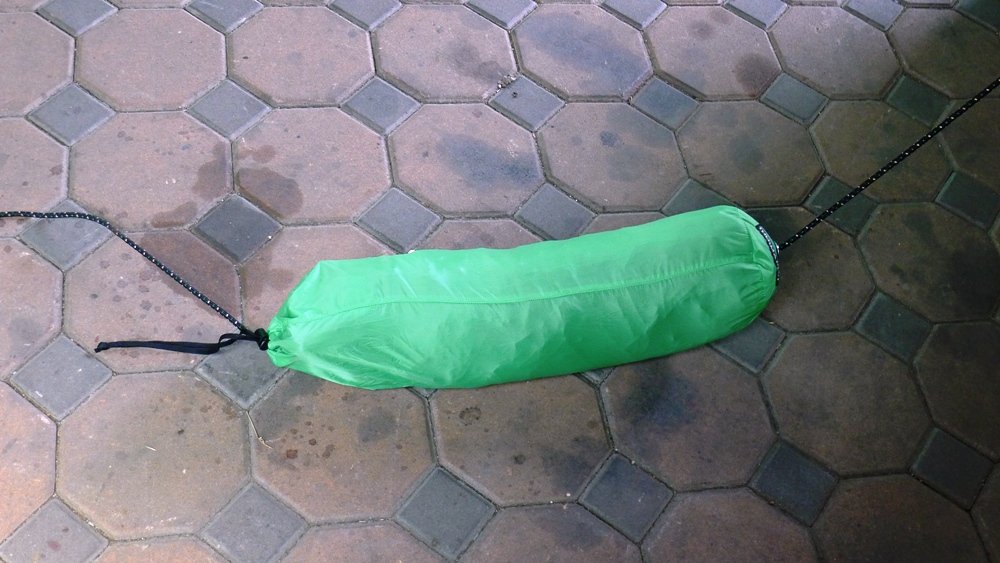
Modified a dry bag into a tube snake for packing the hammock in an organized fashion, looks like the hammock can be erected in about 30 seconds now (handy in rain squalls) -

hammock in snake.jpg


-still can't get over the problem of the packed size of the rail flysheet/ tarp - doesn't seem to be any easy answer apart from praying it doesn't rain.
 
Re: Essential minimalists gear check list for jungle trail t

Real important to know your jungle hammock so you can set up quickly for the night . Setting up at dusk/ in the dark with mosquito's maybe in the rain isnt fun, when you don't know which way around everything should go.

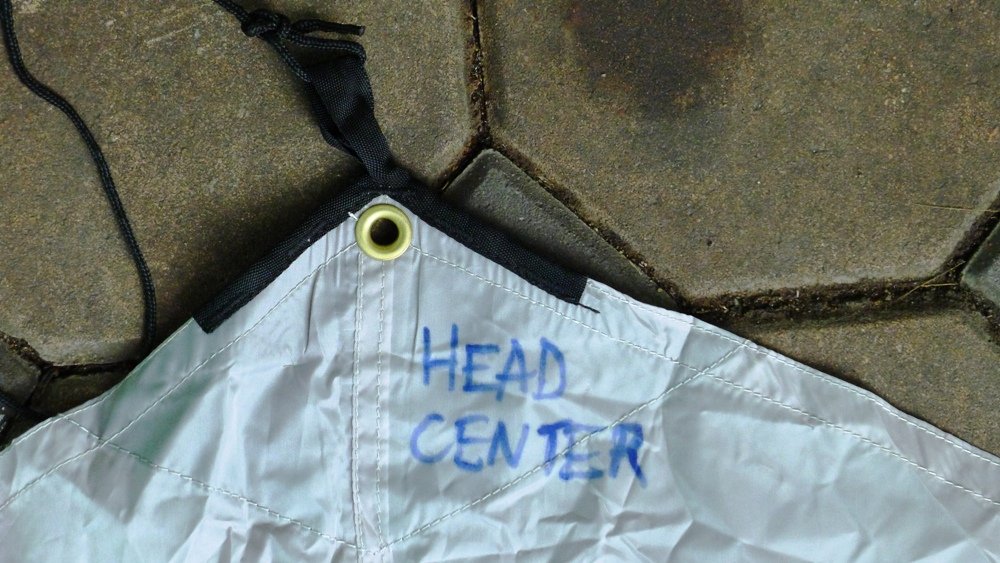
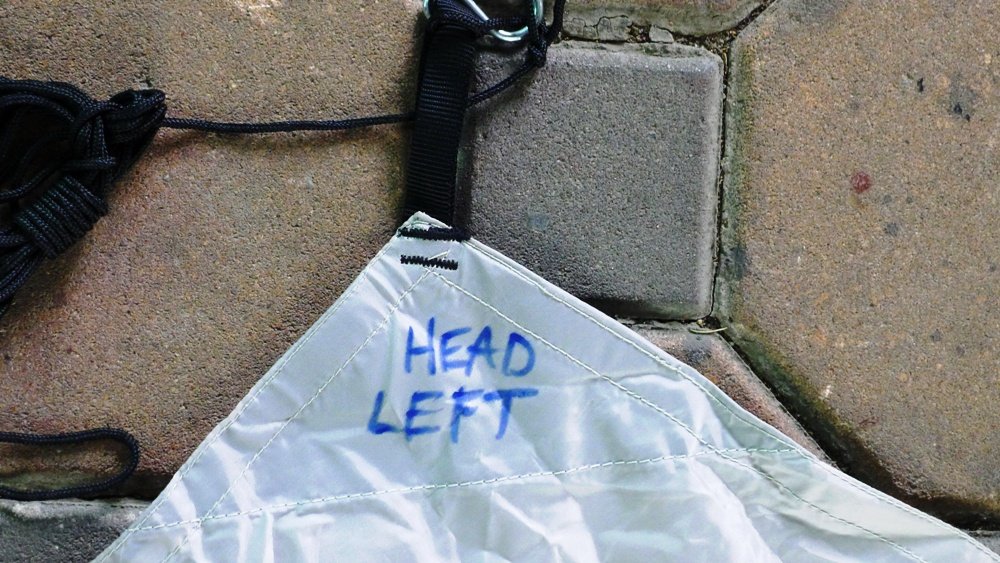
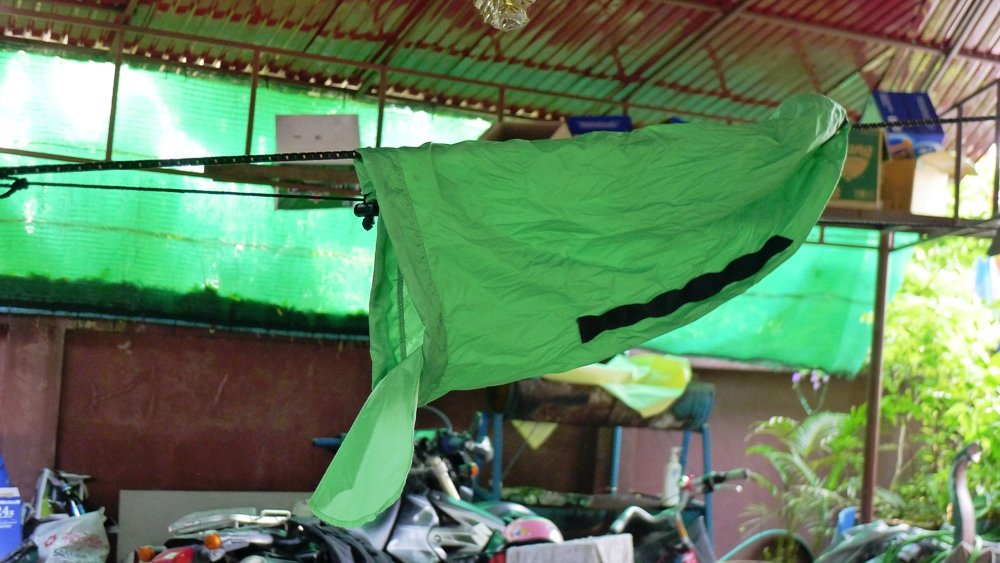
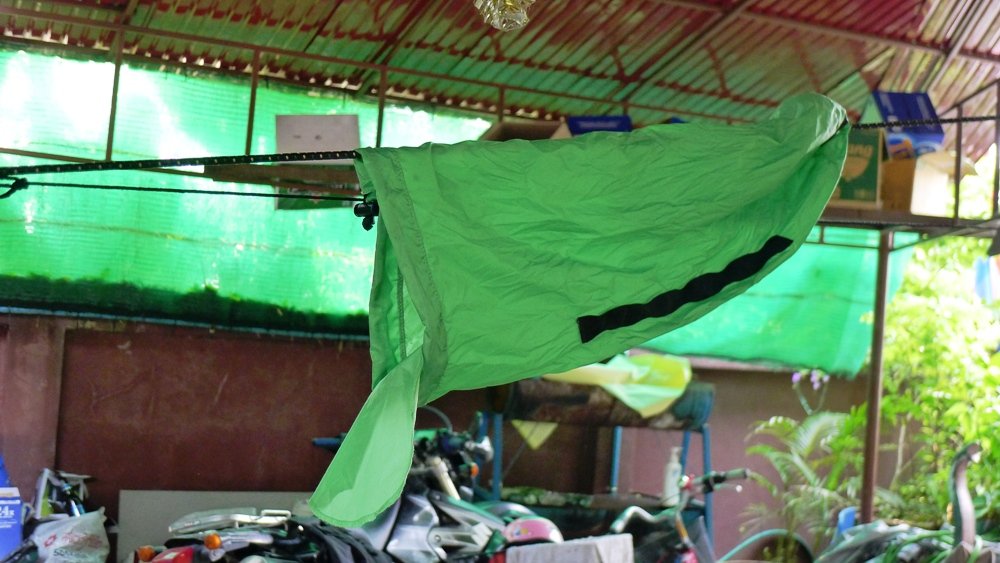
It's a good idea to label the rain fly/ tarp, it is REALLY confusing which way around it should go, no matter how many times you've done it

Hammock rain fly/ tarp labeled below

fly head.jpg


fly head left.jpg


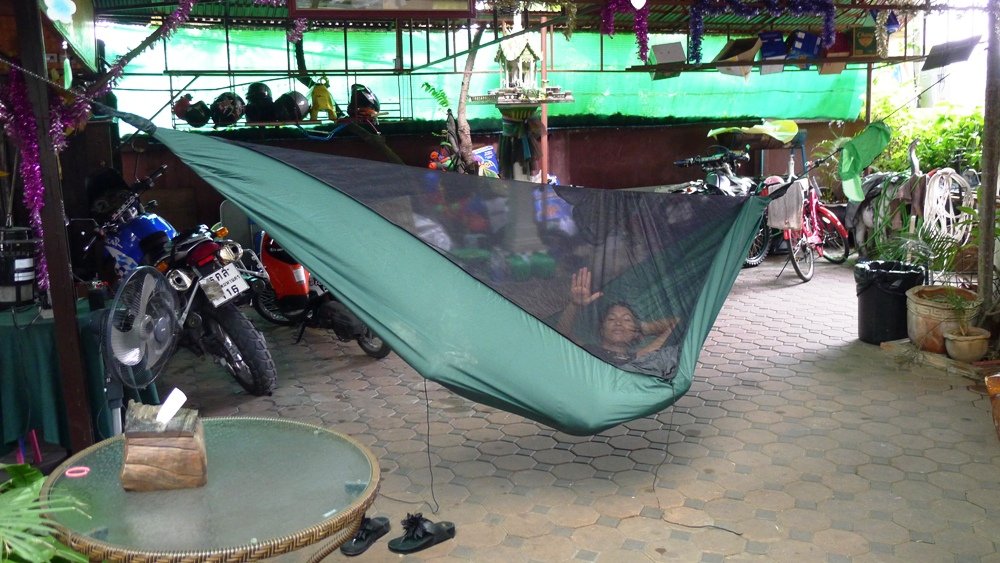
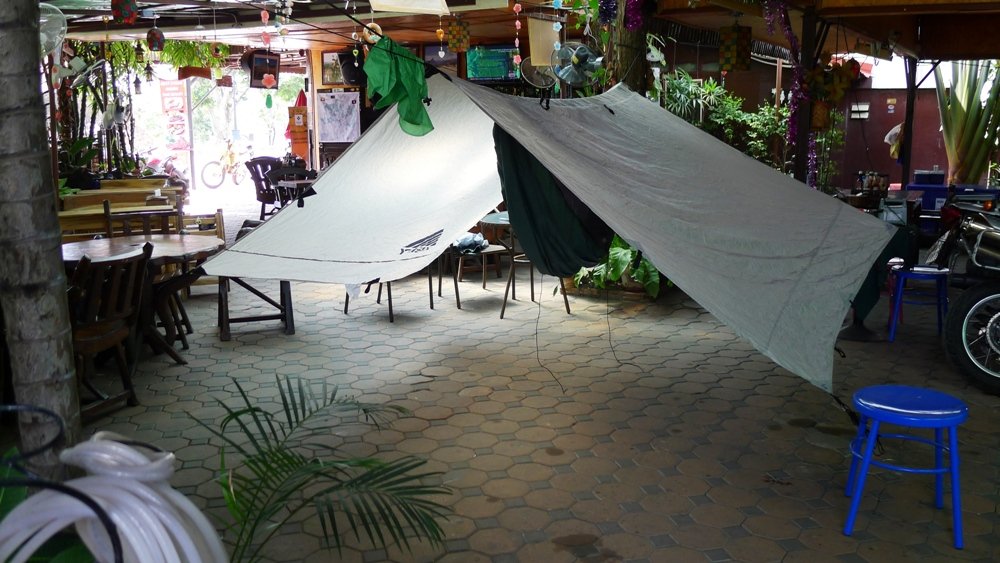
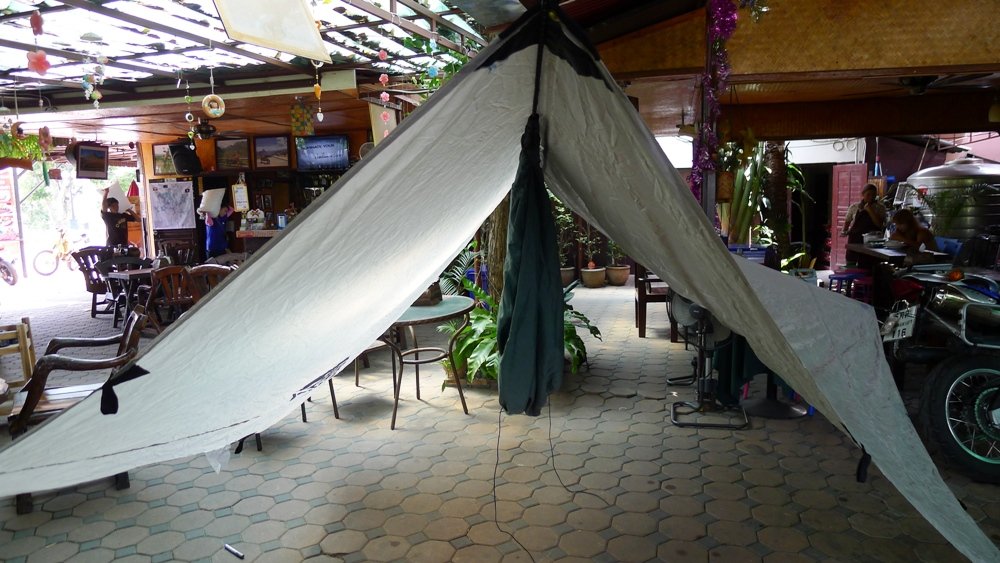
Hammock set up as for test, checking that all the securing lines work and are long enough for all ridgeline situations. This is a Hennessy Hammock with built-in bug net and bottom entry link to their website http://hennessyhammock.com/

hammock no fly.jpg


Testing complete hammock setup. Being in the tropics, I've gone for a lighter rain fly setup which is made by Kelty, very lightweight but will keep you dry. In the tropics good to try and raise the sides of the rain fly/ tarp as high as possible to increase air movement and take the heat away.

hammock set up 1.jpg

hammock set up.jpg


The tube snake (hammock bag) stays on one end of the hammock fixing line (eyelet hole in the bottom of the bag). When you take the hammock down you just stuff it in the tube bag ready for its next use, then all you have to do is fix one end, pull it out of the bag and its erected.

tube snake empty.jpg


Here the hammock in the tube snake bag

hammock in snake.jpg


Tube snake on the line with the hammock in use

tube snake empty.jpg


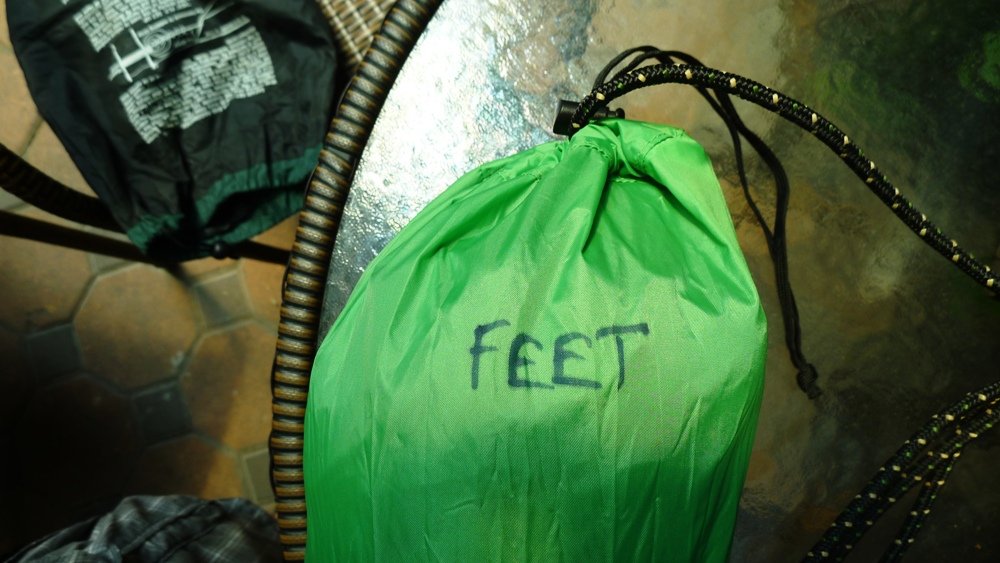
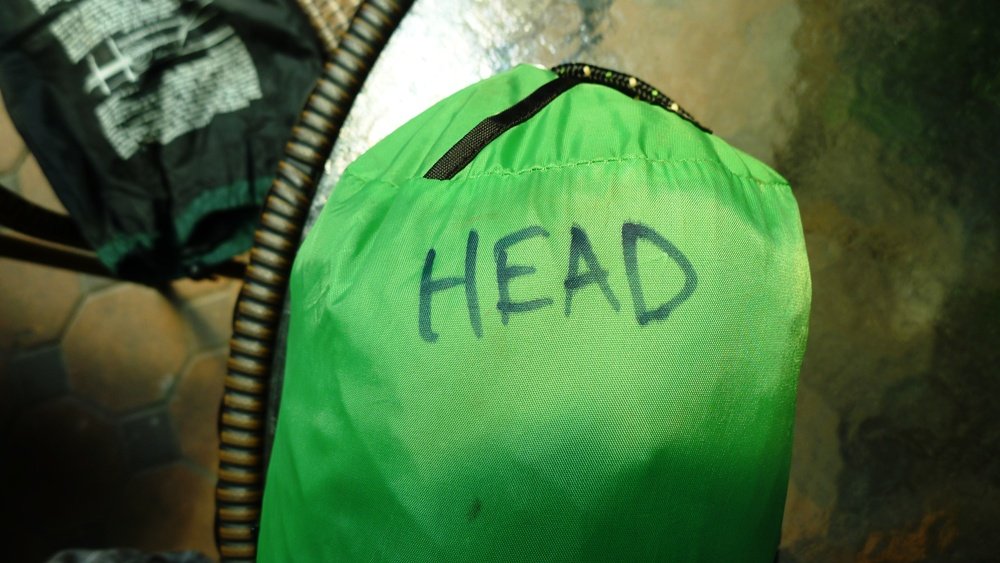
Again label both ends of the tube snake so you know which way around the hammock will be set up

snake feet.jpg


snake head.jpg

Great forum on Hammocks here:

http://www.hammockforums.net/forum/?s=3 ... 8e9be7cc0&
 

Attachments

  • tube snake empty.jpg
    tube snake empty.jpg
    285 KB · Views: 1,107
Re: Essential minimalists gear check list for jungle trail t

funny it's called mosquito hammock but doesn't have a mosquito net. But nice hammock, probably very fast to set up.
 
You can't beat a double ender

You can't beat a double ender


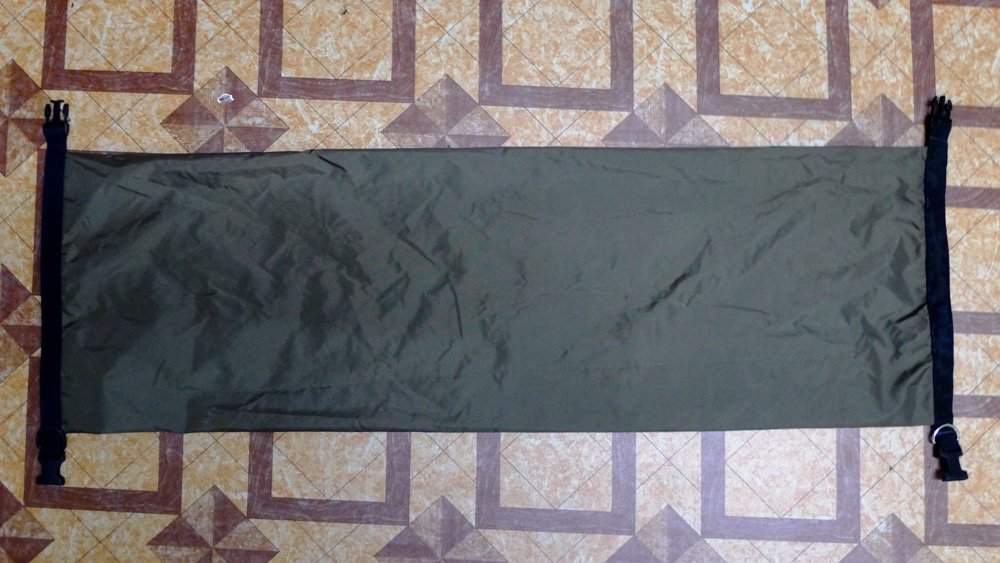
When using a tube, roll-top dry-bag on a trip I always used to find the thing I wanted was at the bottom of the dry bag & because of the dry-bags narrow, long shape, everything had to come out to get to that item at the bottom of the dry-bag.

I've been using double ended dry-bags for a while now & they make so much sense as the roll feature of dry-bags seals both ends water tight. Now nothing is ever in the bottom of the bag. One idea is to keep hot weather clothes in one end and cold weather gear (for up in the mountains) in the other end.


DE dry bag.jpg


DE dry bag 1.jpg


If you're not using roll-top dry-bags already, you should think about getting one. Whatever luggage you are using gets filthy from the dust and diesel fumes, these bags can be washed of with soap and water in about 30 seconds at the end of a trip and are completely waterproof.
 
Re: Essential minimalists gear check list for jungle trail t

bigntall said:
Phil here's a pic of how big my older style Wolfman numberplate bag is, you can see its larger than your newer version.

667644767_LnA6b-M.jpg


I always liked these as you can get access to items I like to get to quickly: maps, snacks, and raingear.


Sorry for my lack of knowledge - where did you get the headlight bag - make and model? (it looks just like what i need) and does it mount direclty on the healight or do you need a bracket?

cheers Kev
 
Re: Essential minimalists gear check list for jungle trail t

thanks
 
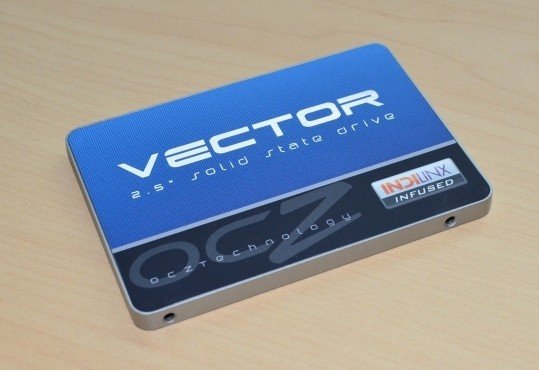
After 11 of the last 16 months "on the road", I reckon I'll refine the gear I carry yet again before I hit the trail again. I like that solid state drive btw... although there's 64 Gb usb sticks now...

Over the last 35,000 km, probably half of which was dirt, I've had IIRC six flats... and that's actually 3 puncture events, with an immediate, or near after, repeat. Two of them were pinched tubes when local lads got a bit over enthusiastic helping me and one was a "professional" repair where they didn't find the source of the flat, so just put a new tube in. Of the three events, two were rear tyres, one front. Oh.. just remembered, another one, on the rear of the scooter. I started out carrying a damn heavy, but good, electric pump. Nah... now its a 180 baht plastic pushbike pump. 100 strokes is about 10 psi... bit more in the rear. I've carried patches the whole time... but never used them. I stop at a local tyre repair place and they always grind the tube a bit and do a great job. They're everywhere. Yes.. I've had to use front tubes in the rear - but not on this trip.

Wheel bearings, seals and brake pads. Essential. I've got as little as 700km out of brake pads in muddy conditions (solid rotors are better than drilled/slotted in the mud... its the holes that fill up and grind the pads away). I've had wheel bearings gone again after 250 km... because I didn't have a new seal. Always flick the cover out and replace the vaseline in the bearing with proper grease... and replace the cover.

Sheepskin. Baaarbaraa comes with me everywhere. My bum's on her all day, my head's on her at night if I'm camping.

Phone number... of someone who speaks the local language and your language in case of trouble. I get a new SIM card in each country too. I've had stalkers (doesn't worry me, just a PITA to be getting 15 calls/messages a day).

More money. I've gone very close to running out after a breakdown that cost me five days in an area with no ATMs.

Gaffer tape... for when your boots fall apart.

I pack everything in drysacks... before I started doing that, I drowned a DSLR and a few other things. Downside of that is that they encourage fungus growth.
 
We had Jeff over the other night, who is a serious mountain bike -adventure rider. With his friends they ride the trails we ride in Laos (on mountain bikes) and generally do about 80km a day, quite astonishing.

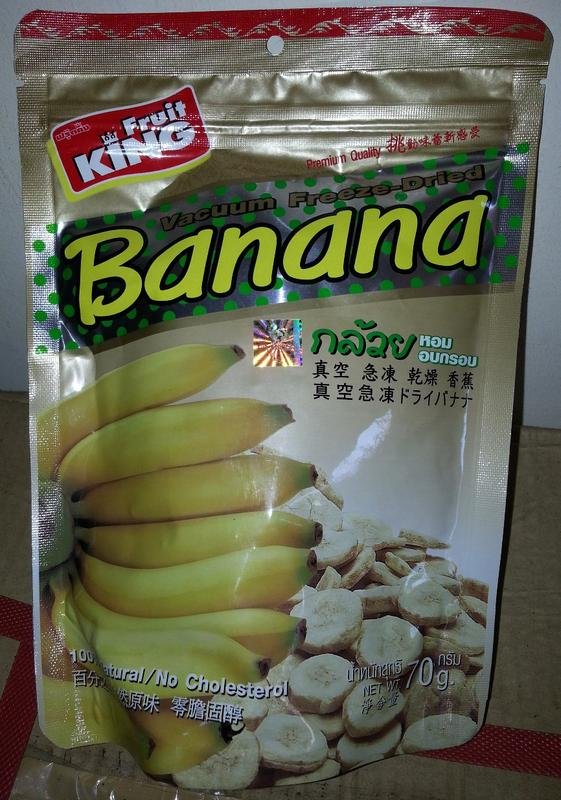
Talking with him about food while underway & what makes the most sense, he narrowed it down to dried Banana's and maybe some kind of tinned fish as well. Something like oats or other slow release energy carbs make sense too.


bnnana.jpg
 
got to be baby wipes and a firesteel surely, 2wheels :)
 
I could get two weeks out of one of those babies :lol3
 
Camping


After some cold uncomfortable nights in the jungle, i'm in the market for lightweight, small, quality sleeping bag to use with a lightweight Thermarest Neo Air air mattress. The cute thing about this combination is that the sleeping bag attaches its self to air mattress with elastic straps so the underside of the sleeping bag can be very thin (you get the underside heat insulation from the air mattress) saving weight and size.


Retails for about USD$ 250


To me for minimalist trail riding/ camping it looks an interesting compromise - i'm getting one and think it will give a decent nights sleep in a hammock or tent.


230972_18101_XL.jpg


231105_9601_XL.jpg


Smallest is the Thermarest Navis, they've made it a minimalist bag to save weight, no zipper etc....


Backpacking light's review


Outdoor Retailer Summer Market 2012 » Therm-A-Rest Navis -- BackpackingLight.com Forums


Therm-A-Rest has been pushing hard into the sleeping bag market this year. While the use of 750+ down left us feeling a little wanting, one product in particular looked pretty interesting from a design standpoint. The Navis can be best described as a cross between a traditional barrel bag and a quilt, but with a twist: They have cut the amount of down used in the top half of the bag so that you can pair it with a puffy jacket. As a result, the bag comes with two temperature ratings, 45F when used as-is, and approximately 25F when used in combination with an insulated jacket. Of course that number will vary depending on your choice of jacket. The innovative features don't stop there however. The bottom side of the bag (the part that sits against the sleeping pad) has no insulation, just a thin layer of fabric. Additionally, the underside of the bag has two stretchy straps designed to fasten it to the sleeping pad (not just Therm-A-Rest pads, but many other manufactures will work as well so they tell me). The bag is barrel shaped and has no zipper; getting in-and-out may be difficult for some and venting options will be rather limited. The weight of the bag is 21oz.


Outdoor Gear Lab doesn't like it (for trail riding I don't agree with them)

Therm-a-Rest Navis Review - OutdoorGearLab

The Therm-a-Rest Navis is the company's lightest sleeping bag. It saves weight by omitting a zipper, eliminating insulation from the bottom of the bag, and by not having a hood. Two elasticized mesh straps secure the bag to any sleeping bag up to 25 inchs wide. Unfortunately, the bag weighs more and is colder than than many other sleeping bags we've tested. This is also the least comfortable and least versatile sleeping bag tested.


The Navis is one of our lowest scoring sleeping bags. At 21 ounces it's moderately lightweight and kept our testers warm into the forties. The bag suffers from numerous drawbacks that limit its performance and versatility: (1) it has a fixed girth that cannot accommodate changes in body type or clothing. Unless you're really skinny, a midweight down jacket won't be able to loft properly inside of it. (2) The lack of a zipper limits ventilation. Our testers turned the bag over and slept with the uninsulated side up during warmer nights. We much prefer bags with full length zippers or quilts because they can be used as a blanket on hot nights and can be draped around your body in camp. This bag can't do either of those. (3) The elasticized pad attachment straps are permanently fixed to the bag and are significantly heavier than attachment methods on other bags we've tested. They are successful in that they're very secure – even those who thrash about at night will remain on the pad – but unnecessary for most people. Several small webbing loops allow you to secure the pad with a thin cord; this is more versatile and lighter. If we used this sleeping bag more we'd cut the elasticized loops off.

Numerous other sleeping bags offer increased warmth to weight ratios, more comfort, and more versatility. See our full Backpacking Sleeping Bag Review.


1344381588_66554.jpg


231106_12564_XL.jpg


Other choices


Comparative Review At-a-Glance
See more side-by-side comparisons
This ProductEditors' ChoiceBest Buy Award
Product NameTherm-a-Rest NavisKatabatic Gear PalisadeKelty Cosmic Down 20
Video
Street Price$249$370Varies $90 - $130
Compare at 2 sellers
Overall Score 100
0
36


100
0
80


100
0
44


Editors' Awards
editors_choice_25x70.gif
best_buy_25x70.gif
ProsLightweight.Most comfortable and most versatile quilt, high warmth to weight ratio, best pad attachment system, hydrophobic down option, ultra comfy neck closure,Excellent value, draft collar seals in warm air, differential pull cords make hood easy to adjust and comfortable when cinched fully.
ConsLow warmth to weight ratio, permanent pad attachment straps, limited ventilation, fixed girth reduces versatility, can't be opened up to dry out or drape around you.Other Katabatic quilt models are warmer, ZPacks bags are warmer for their weight.550-fill down is not as compressible or light as higher fill powers, low quality fabrics, not as warm as other 20 degree bags.
Best UsesNot recommended.Ultralight anything, fast and light winter trips with a down jacket.budget car camping and summer backpacking
Date ReviewedNov 11, 2012Nov 02, 2012Nov 17, 2012
Weighted MetricsTherm-a-Rest NavisKatabatic Gear PalisadeKelty Cosmic Down 20
Warmth 10
0
2


10
0
5


10
0
5


Weight 10
0
8


10
0
9


10
0
3


Comfort 10
0
4


10
0
9


10
0
5


Packed Size 10
0
7


10
0
10


10
0
4


Features 10
0
2


10
0
10


10
0
6


Versatility 10
0
1


10
0
8


10
0
4


Product SpecsTherm-a-Rest NavisKatabatic Gear PalisadeKelty Cosmic Down 20
StyleMummyQuiltMummy
Total Weight (oz)2118.842.5
Total Weight (lb )1.311.182.66
Fill Weight (oz)8.259.520
Material Weight (oz)12.759.322.5
Fill Power750900550
EN Comfort RatingNANANA
Neck BaffleNoPassivePassive
PocketNoNoNo
Zipper LengthNoneNoneFull
Shoulder Girth58NA58
Hip Girth58NA-
Foot Girth40NAUnknown


Thermarest's manufacturer "Cascade Designs" also sells other top quality, lightweight camping gear thats worth a look:


http://cascadedesigns.com/therm-a-rest/sleeping-bags/category
 
I got this sleeping Bag from PHD UK.

View attachment 15051
Minim Ultra Down Sleeping Bag

It weighs an incredible 12oz and works great with the small Thermarest Neo Air. Good down to +8C (in the buff!:kat)

PHD Sleeping Bag 12oz + Thermarest NeoAir XLite 12oz + MSR Hubba Tent 3Lbs 4oz = 4Lbs 12oz (2.1Kg)
 
The concept as to why the air mattress works:

[h=2]Sleep Securely[/h] The key to our System Solution is our patent-pending SynergyLink Connectors, which make sure you stay on your pad, and stay warm all night. Two flexible fabric bands create a snug fit around almost any mattress, keeping your bag centered and eliminating problems with sliding, twisting and cold spots. Therm-a-Rest blankets use the included loop kit to achieve the same performance. SynergyLink Connectors are designed to fit any mattress up to 25 inches (63 cm) wide.


tar_design_sleep_warmer.jpg


Sleep Warmer Zoned Insulation puts loft where it helps you the most. Fill is concentrated in the top of your sleeping bag, where it traps rising warm air. The bottom of the bag is insulated by your mattress and requires considerably less fill to keep you warm. Our construction is based on thermal mapping and supported by over forty years of sleep research.


tar_design_move_freely.jpg


[h=2]Move Freely[/h] Therm-a-Rest sleeping bags are designed with extra room in the torso to allow your shoulders, elbows and hips to move freely. At the head and foot the fit is closer, keeping you warm and decreasing overall weight. More than 70% of people are side sleepers. Our Efficient Comfort design is ideal for side sleepers or anyone who wants more freedom of movement without adding extra weight to their pack. Try a bag and experience the difference.


[h=2]Carry Less[/h] By reducing what you don't need, we've made our bags among the lightest on the market. Just as important - we've achieved this level of performance without sacrifices in space or comfort.
 
Another good choice for a lightweight sleeping bag -
[h=1]Katabatic Gear Palisade[/h]
Expensive - USD$ 370


Website:

Katabatic Gear Palisade Review - OutdoorGearLab


The Katabatic Gear Palisade is likely the best three-season backpacking sleeping bag in the world. Based on our criteria for evaluation and experience testing nearly 40 different backpacking bags, the Palisade tops the charts as the the best all-purpose bag for multi-day trips in three-season conditions. The bag weighs 18.8 oz. on our scale and kept our testers warm to around freezing.

Moving from a quilt to a traditional style bag reduces versatility and adds weight. If you prefer a bottom to your bag we suggest the ZPack's 20 Degree for the highest warmth-to-weight ratio and the Feathered Friends Hummingbird if you want an attached hood. At only $100 the Kelty Cosmic Down 20 offers the best bang for your buck.

Also see our General Purpose Sleeping Bag Review and Winter Sleeping Bag Review.


231016_14644_XL.jpg
 
I carry a lightweight down sleeping bag, weighs 600gm and packs down to about the size of a box of tissues. Its all I've needed in Asia so far. I haven't carried a tent in Asia, only in Australia... I did buy a bivvy sack but the damn thing stinks... the rubberising or something is horrible. I carried a large groundsheet instead, but haven't used it yet. Its just backup in case I can't grab a bit of floor or a bed somewhere.
 
I'm always wiling to check out other options when it comes to sleeping in the bush. For years I've been doing it hammocks.

Pro's: *more comfortable than sleeping on the ground for me. Others hate it though.
*Post ride I can lounge around comfortably in the hammock in or out of the bag, quilts, use it as a chair etc. This is a positive over the bag on the ground in my eyes.
* If its pissing rain I am off the ground above the rain running off the mountain. This has only happened twice though to me.

Cons: Sometimes finding appropriately spaced trees necessitates me getting into tight and cramped spaces with branches poking everywhere. whereas a bivy and bag and I can lay anywhere.

My complete hammock, tarp, down quilts upper and lower, straps all pack into this bag.
View attachment 15171
P1080213-L.jpg


Phil what was the comfort like of your bag and Neo Air compared to the hammock? With a tarp thrown in will it pack smaller than my package above?
 
Phil what was the comfort like of your bag and Neo Air compared to the hammock? With a tarp thrown in will it pack smaller than my package above?


For whatever reason, even sleeping diagonally, i don't sleep well in a hammock .... This set up on the floor, i sleep like a baby, it is excellent "for me". I will measure and weigh it all.
 
An excellent article in the link below discussing how to pack light for expeditions, very relevant for jungle trail tours. It's really well written


Lightweight Backpacking 101: An Introductory Manual for Lightening Your Load Today (1st Edition - August 2001) @ Backpacking Light


& below "how light can you go" - It really does make a difference

http://www.backpackinglight.com/cgi-bin/backpackinglight/philmont.html#.UTIV2WfK8tg


Below is the section about carrying food, you need a lot of calories


Trail Food
by David J. Schultz​
Introduction
The author Henry Fielding wrote, "We must eat to live and live to eat."
Nowhere is this more true than on the trail. After a long day on the trail, your body needs fuel. Furthermore, if you are like me, you will find that few things can make you forget the weariness in your limbs like a good meal. The challenge comes in trying to keep weight and bulk to a minimum while keeping nutrition and good taste to a maximum. As if this were not a hard enough balancing act I also place a high premium on ease of preparation and clean up. When cooking on the trail the hardest thing that I want to do is boil water and pour it in a bag.
Now I know what you are thinking, “Great! Another article on which brand of freeze dried meal tastes the least like sawdust.” Oh contraire, dear reader. Those freeze dried meals are about $7 each. On principal, I just can not bring myself to buy those things (see my other article in this issue, “Ultra Cheap, Ultra Light”). Price, however, is not the only problem that I have with using commercially prepared freeze dried backpacking meals. They tend to be bulky, the portions are sometimes on the smallish side, their quality is inconsistent, and they are often lacking in nutrition. There is one more reason I tend to avoid buying prepackaged trail meals… I love to cook. It is an ego thing and I don’t mind saying so. I find few things as satisfying as hearing comments on how small and light my pack looks as I walk into camp, how good my food smells and looks as I eat, and how nice it must be to only have to boil water and not even have to clean a pot when I’m done.
Nutrition
Unless you are a thru hiker who will be eating on the trail for many weeks in a row, nutrition while hiking means calories. A few days without the proper ratios of vitamins and minerals in our diet will not harm most of us. This doesn't mean that you should ignore vitamins and minerals in your meal planning. It simply means that calories are king. A few days of hiking at a big caloric deficit can make you miserable and put a damper on an otherwise wonderful trip.
Going ultra light means that you can go farther and faster than you were able with your old heavy pack. Twenty-plus-mile days are common in ultralight circles. While this new found freedom is made possible by shedding pounds, you do pay a penalty in increased energy usage. In his book, “Factors and Formulas for Computing Respiratory Exchange and Biological Transformations of Energy”, T. M. Carpenter lists the caloric expenditure of almost every activity imaginable, including sleeping and hiking. Search Google for the "House of Nutrition" site, which has this type of information. I found that my 225 lb. body will burn well over 6500 Calories during an 18 mile day of hiking that includes 3000 feet of elevation gain.
This is probably a good time to include a note of caution. There are many methods and variables involved in the calculation of caloric expenditure. Your best calculation is only an estimate to use as a starting point. The key is to test your estimate in the field on shorter trips. It would be foolish to pack food for a 2 week trip based solely on an untested calculation of caloric expenditure. After some field testing on shorter trips you will soon get an instinctive feel for how much food you need for hiking in various conditions.
To put this caloric expenditure in perspective, 11 Big Macs contain something in the neighborhood of 6300 Calories and weigh about 5 lbs. Think of it, a five day trip would require that I carry 55 Big Macs. These would certainly fill up a big pack and would weigh more than all of my gear combined. You can see that we have to find trail food that is more calorie dense than Big Macs. With any luck our trail food will also taste better too.
Butter has roughly 200 Calories per ounce. A big Mac has 80 Calories per ounce. I have read that some ultra lighters try to average 150 Calories per ounce of food. However, a diet that averaged 150 Calories per ounce would, of necessity, be very high in fats and not terribly interesting. A generally accepted target is an average of 125+ Calories per ounce of food. At an average of 125 Calories per ounce my 18 mile days would only require 3.25 lbs of food per day. The USDA Nutrient Data Laboratory (hey, you should be a Google expert by now) website has a searchable database of just about every food imaginable and lists, among other things, the calories per 100 grams of a given food.
Note: Technically, the energy value of food is measured in Calories, not calories. Each food Calorie is actually a kilocalorie or 1000 calories. This may be confusing when consulting scientific web sites.
How This Really Works
After looking at the Calories per ounce in a variety of foods you will probably notice that it is not easy to make an interesting diet from only foods that pack 125 Calories or more per ounce. The secret here is to remember that we are talking about an average of 125 Calories (kcal) per ounce in your diet. For example, 1 oz of raisins has only 82 kcal. But, when that one ounce of raisins is combined with 1 oz of gold fish crackers (141 kcal) and 1 ounce of cashews (160 kcal), the resulting “trail mix” contains an average of 127 kcal per ounce. For dinner, 190 grams of dry instant rice (enough to make 2 cups of cooked rice), contains only 107 kcal per dry ounce, but when some tomato powder, dried vegetables, spice and 1 oz of butter flavored or pepper flavored oil is added, the resulting Spanish Rice contains about 125 kcal per ounce of dry weight. The key to making a tasty diet that is also calorie dense is stacking the deck with ultra high calorie foods. Such foods include: nuts, peanut butter, chocolate, butter, oils, snack chips and crackers, pepperoni, and pre-packaged cooked bacon.
My standard operating procedure when I plan meals is to work around the number of calories that I think I will need in a day. First I create dinner, being careful to note its caloric content. Next I create lunch, again noting the calories. Lastly, I fill in the remaining calories for the day in the form of snacks to be eaten through out the day. I do not typically eat “breakfast”; I just start snacking as soon as I wake up. I have a tendency to not eat enough during the day which can result in a horrible “crash” in the mid afternoon when my body runs out of energy. To combat this I eat a snack at least once an hour whether hungry or not.
Dinner is the BIG meal of the day for me. It is more than just a meal; it is a ritual of relaxation. I don't eat dinner while I walk. Even if I am in bear country, I eat a few miles before I stop to set up my camp for the night and take my time. I don’t rush dinner, but neither do I want to be bothered much with its preparation. Dinner is when I sit down and relax. My body unwinds a bit from the work of the day as I boil water and then savor my repast. I have found a technique which allows easy preparation and clean up as well as providing tasty and nutritious food.
I make my dinners in single serving bags which require only that I add boiling water and wait for several minutes while the food “cooks”. I then eat my meal straight from the bag. When I’m through eating I zip the bag back up and pack it out. There is no pot cleaning for me on the trail. My current packaging bags of choice are the one quart size Glad “Stand and Zip” bags. These bags are much stronger than regular freezer zip locks and easily stand up to boiling water. After the meal is bagged, I simply roll the bag up and place a rubber band around it. A dinner packaged like this will withstand a tremendous amount of abuse. When packaging these meals at home I start with the dinner foundation first. This is typically a starch such as pasta, rice or potato flakes. Often a prepackaged rice or noodle side dish is the foundation. Next in the bag goes whatever suits my fancy: dehydrated veggies, meat, tofu crumbles, and spices. I write down the caloric content and the amount of water and oil (or ghee) needed on the outside of the bag. Occasionally, I will forget to record the amounts of the different ingredients and have to guess at the amount of water to use. A good rule of thumb is one cup of water for every one cup of dry ingredients. If you put in too much water, just gradually add a bit of couscous, instant rice or potato flakes to absorb the excess. Finally the bag is zipped shut and all excess air is forced out. To prepare the meal simply boil the appropriate amount of water, add the boiling water and oil to the bag, seal it, mash the contents around through the closed bag to mix, wrap the bag in some unused clothing to insulate it (often unnecessary), and wait 5 to 15 minutes (depending upon what you are cooking).
Your local supermarket can provide most of the foods for your hiking pantry. Health food, ethnic food, and online specialty food stores will provide variety and some harder to find items. Here is a list of some things that typically go into my “easy cook” hiking meals:

  • Prepackaged rice or noodle based side dishes (I only get those that cook in less than 8 minutes.)
  • Instant potatoes (I especially like the flavored varieties. Try several as the taste varies greatly among brands.)
  • Ramen noodles
  • Angel hair pasta (This will cook by being submerged in boiling water with no simmering needed.)
  • Couscous
  • Instant rice
  • Dried refried bean flakes
  • Dehydrated or freeze dried vegetables ( I dehydrate most of my own – it is really easy and cheap. These can also be purchased online from Enertia Trail Foods or Just Tomatoes, Etc.)
  • Spices
  • Powdered gravy or sauce mix
  • Oil (I typically use olive oil or flavored oils. The popcorn section of most supermarkets has butter flavored oils.)
  • Clarified butter or ghee (If you want to make this at home a quick web search on “clarified butter” or “ghee” will yield dozens of hits. One of my favorites is at Ayurvedic Foundations web site. Ghee can also be purchased in stores that sell food from India. As long as no moisture is introduced to the ghee it does not require refrigeration.)
  • Grated Parmesan Cheese
  • Sour Cream powder
  • Dehydrated cooked ground beef, chicken, or tuna ( Some freeze dried meats are available commercially, but they cost an arm and a leg, so I dehydrate my own.)
  • Dehydrated tofu crumbles (Tofu crumbles – a ground beef substitute - are available in many grocery stores. I then dehydrate them for trail use. Their taste and texture are very much like ground beef.)
  • Textured vegetable protein (TVP is available in many health food stores.)
Lunch, to a lesser extent than dinner, is also a time of relaxation for me. On most days by the time I stop for lunch, I have already been walking for 4 or 5 hours. I typically will make lunch a one hour rest stop that allows me to catch my breath, wiggle my toes, and let my socks and shoes air out. Again, ease of preparation is key to me so I rarely heat lunch. Current lunch favorites include peanut butter, honey, crackers, pound cake, flat bread, pepperoni, cheese, dried fruit, and nuts.
Trail snacks usually consist of anything that I can eat while walking. Lately I find myself munching various brands and types of high nutrition food bars (the excellent Luna brand of bars are my current favorite), the old standby – gorp, home made trail bars, various flavors of sweet cakes that come from military MREs, and goodies from the Little Debbie family of snacks.
After dinner snacks are always a part of my hiking cuisine. Typically, I will bag a half box of “no bake” cheese cake or perhaps some instant rice or bread pudding. If stealth camping (no cooking where I sleep), desert can be my first meal the next morning.
Condiments and extras play an important part in the overall enjoyment of a trip. There is always a ¼ ounce of Tabasco brand pepper sauce and ¼ ounce of spicy seasoned salt in the food bag. The added weight is negligible, the enjoyment is not. I usually take a small amount of spirits. Depending upon the trip and mood my preference in choice of spirits will fall toward one of two extremes. I may bring a wee dram ‘o the peaty dew, i.e. a small quantity of a fine single malt scotch (usually Lagavulin from the Isle of Islay). At the other end of the spectrum are the makings for a true ultra light cocktail - a few ounces of 190 proof grain spirits and vitamin fortified Crystal Light drink mix powder. The high proof spirits give twice as much bang for the weight and serves double duty as both stove fuel and an effective disinfectant. Sometimes the liquor goes home unopened and sometimes it disappears during the first night.


Some more food ideas below for things to carry for a planned trip out into the middle of nowhere for a few days:


http://www.backpackinglight.com/cgi...ums/thread_display.html?forum_thread_id=68549


http://www.backpacking-guide.com/backpacking-food.html


"Beaver" stew
1349187213_69441.jpg
 
For whatever reason, even sleeping diagonally, i don't sleep well in a hammock .... This set up on the floor, i sleep like a baby, it is excellent "for me". I will measure and weigh it all.


Yep hammcoks are an acquired taste. and don't work for everyone. It took me about 3 nights out before i felt comfotable in them.

Only thing missing from your set-up is a bug net and tarp. Whacha gonna use?
 
Pain medication


Two friends have just had serious bone breakages in remote riding areas, one completely snapped his arm the wrong way at the elbow joint. He said, looking back on this experience, that you cannot emphasize enough how important strong pain medication is in these situations. It could be more than 24 hours before you're in a medical facility, he said the pain was unbearable.


From a friends advice who's a successful heart surgeon in the U.S, I carry ingest-able tablets of merperdine (pethidine/ demerol) & hydrocodone.


8617726155_53e81ba7fa_b.jpg


Inject-able pain relief is far more effective but not practical for jungle riding, for instance morphine in ingest-able, tablet form is not very effective, tablets of merperidine and hydrocone are more effective. Not sure how easy they will be to get in a Thai pharmacy, you may be able to get them from a hospital.
 
Back
Top Bottom